.png?width=160&height=160&name=Logo%20with%20Text%20(4).png)
Accommodations in AbleSpace ensure that each student's individual needs are documented, monitored, and met. With several flexible options for logging and managing accommodations, you can streamline your workflow and maintain organized, accurate records.
This guide walks you through the three main ways to add and track accommodations in Ablespace.
A. Add Accommodations from the Caseload
To add accommodations directly to a student’s profile from your caseload:
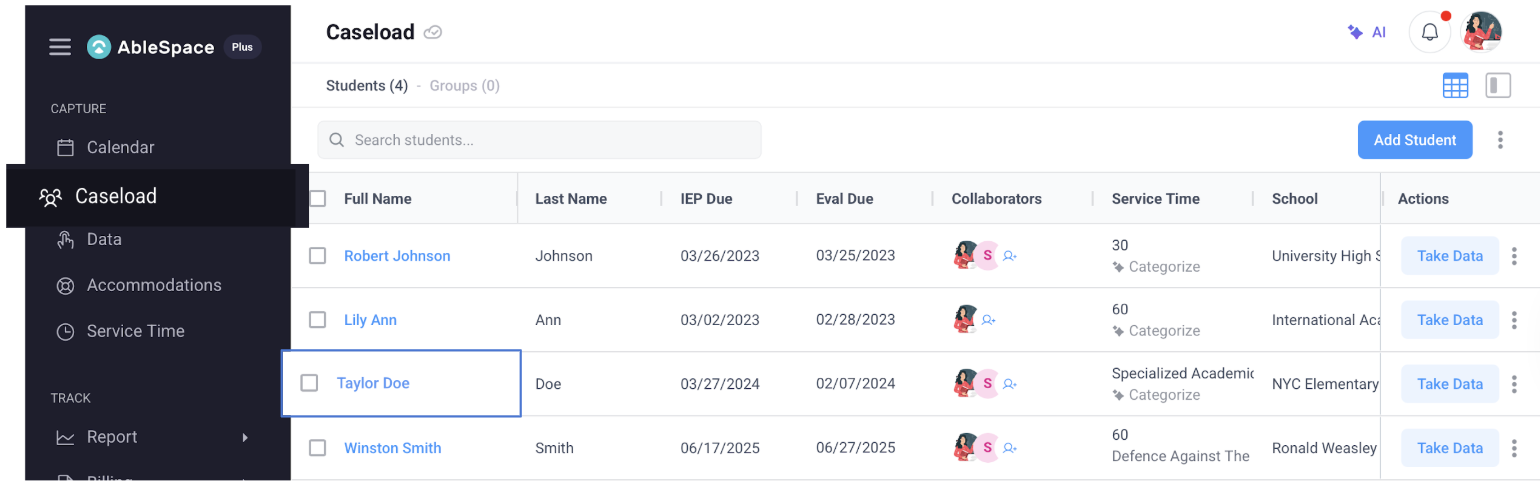
- Open a student profile from your Caseload.
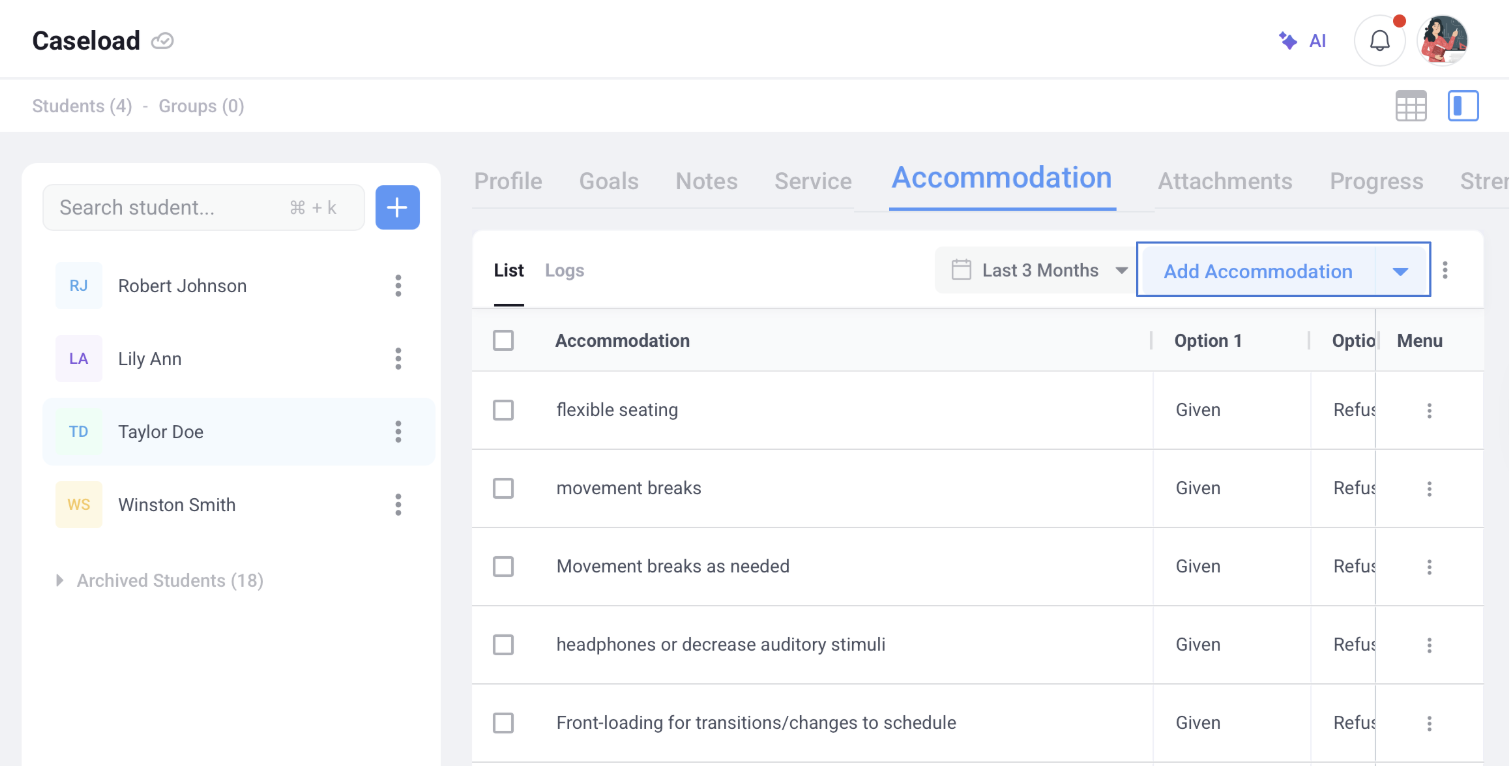
- Navigate to the Accommodations section.
-
Click Add Accommodations.
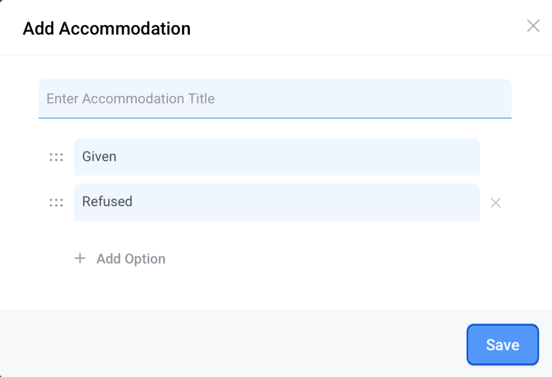
- In the modal window that appears:
- Enter the title of the accommodation.
- Select any specific options or parameters needed (e.g., Given, Refused, Partially Provided)
- Click Save to add the accommodation to the student’s record.
To add accommodations for multiple students at once:

- Click on the Add Accommodations dropdown and select Bulk Add Accommodations.
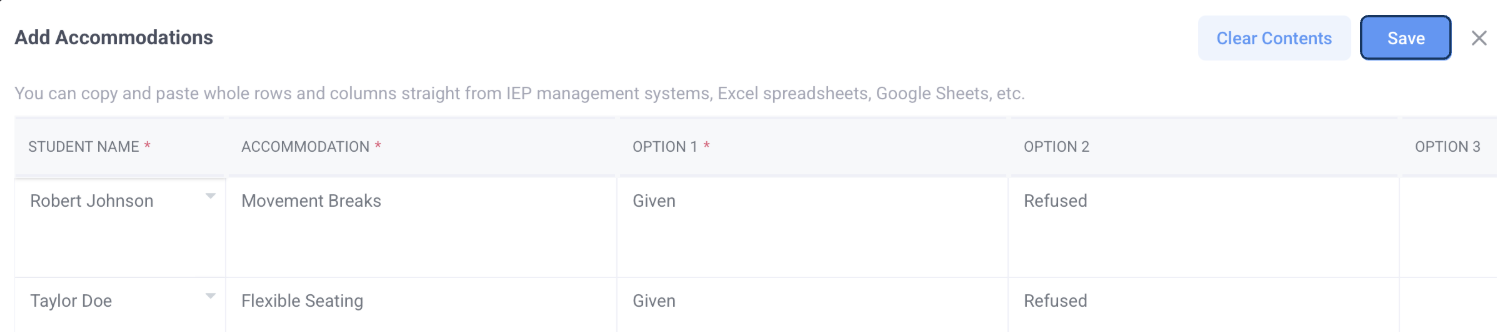
- In the dialog box that appears, select the students’ names and enter the accommodations and specific options for each.
- Click Save to add the accommodations to all selected student profiles simultaneously.
To edit or delete an existing accommodation:
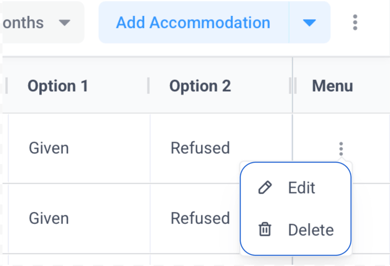
- Click the three-dot button next to the listed accommodation
- In the popup that appears,
- Click edit to alter the accommodation.
- Click delete to remove it entirely.
B. Log Accommodations for Multiple Students
To log accommodations for multiple students from the main Accommodations tab.
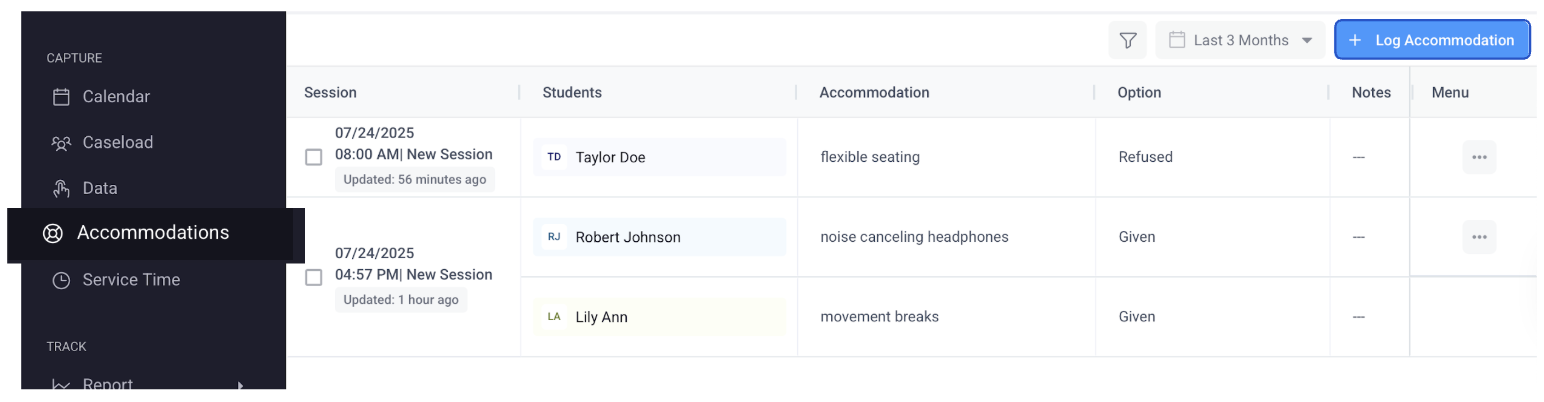
- Navigate to the Accommodations tab.
- Click the + Log Accommodation button.
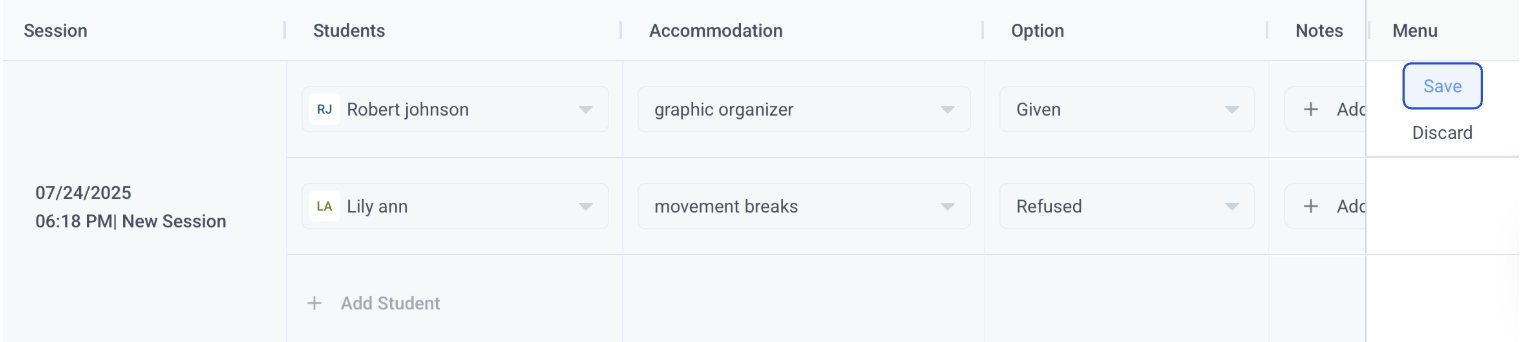
- An editable row will appear where you can:
- Enter the date, time, and session name.
(Defaults are set to the current date and time, but can be changed.) - Add and select students.
- Choose existing accommodations or create new ones.
- Fill in the specific options.
- Add student notes and group notes if needed.
- Enter the date, time, and session name.
- Click Save to log the session with all selected accommodations.
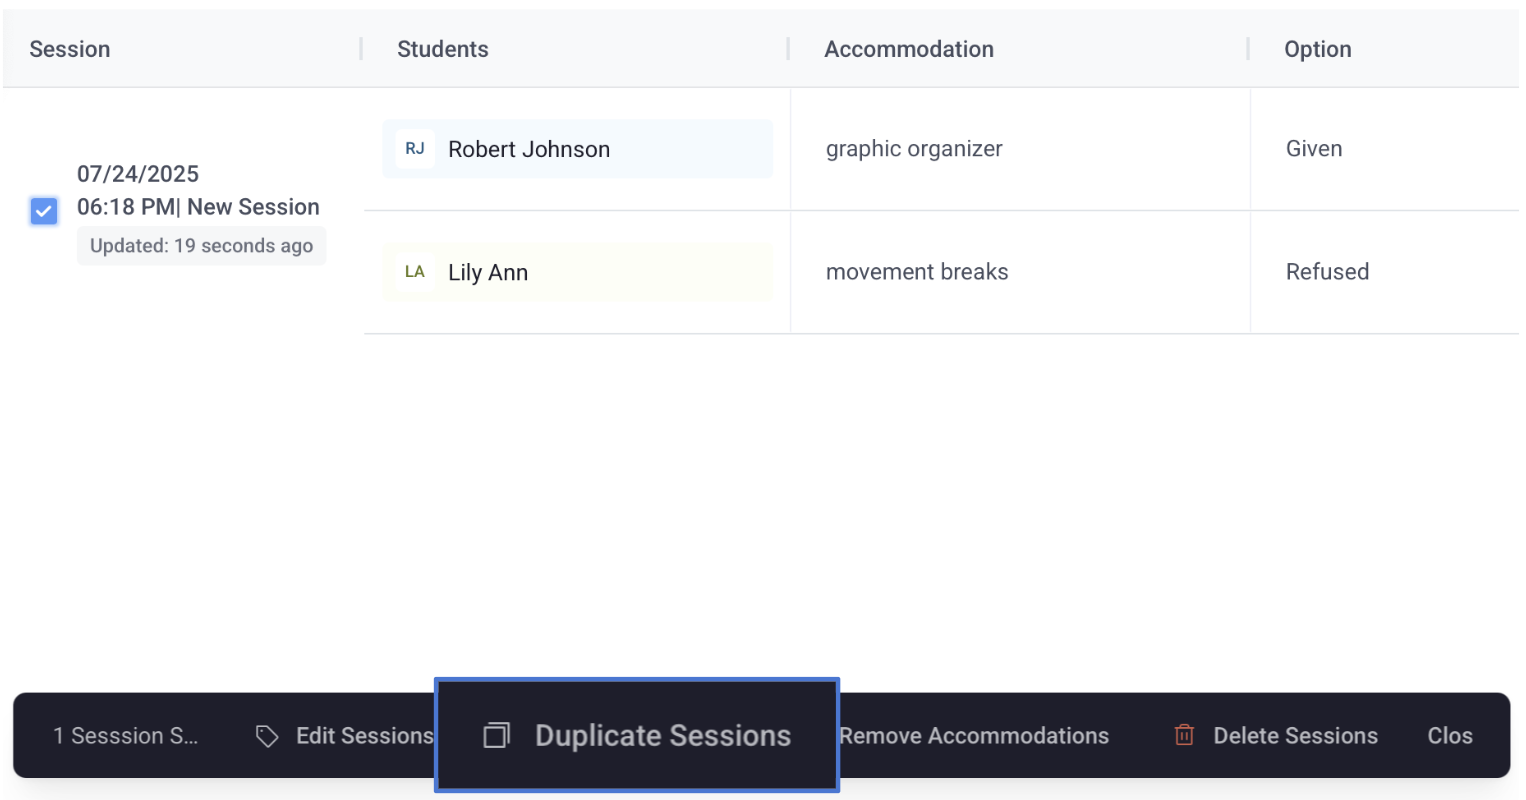
- To reuse the same setup, select your preferred session and click the Duplicate Session button in the session action toolbar.
C. Add Accommodations to an Existing Event
To add or modify accommodations within already scheduled events on your calendar:
- Navigate to the Calendar tab
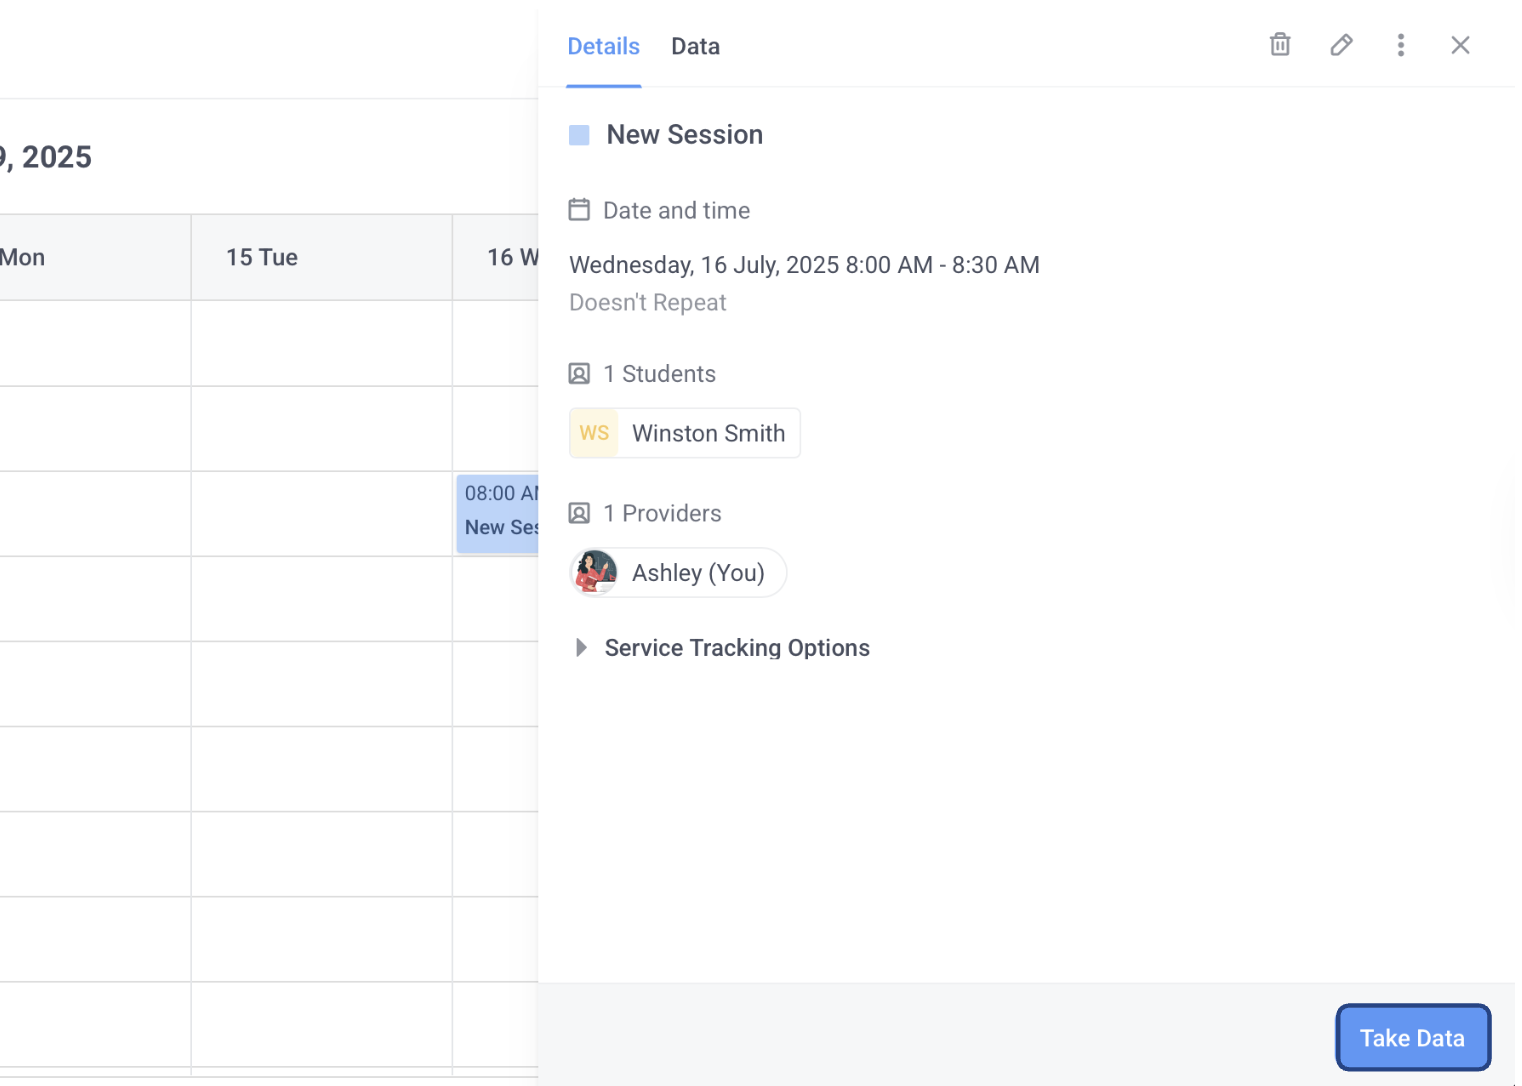
- Click on your preferred event to open a sidebar that displays the event details
- Click on the Take Data button in the lower right corner of the side bar
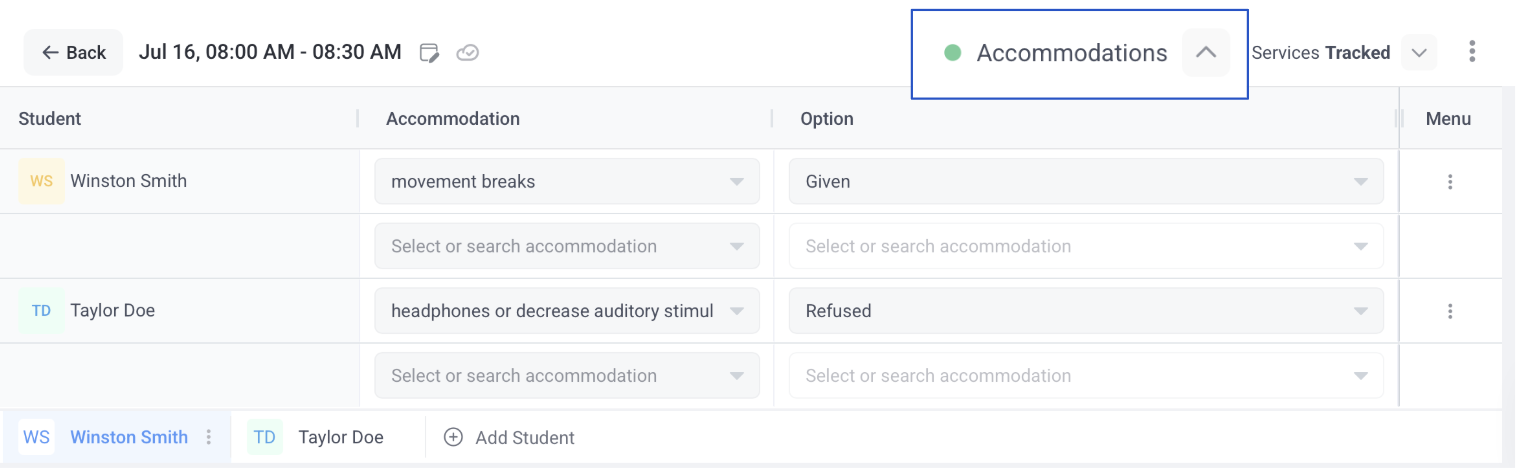
- In the Take Data screen that appears, click the arrow next to the Accommodations section to expand the table.
- For each student listed, enter the relevant accommodations and options directly into the table.
This feature keeps your event details centralized and ensures no accommodations are overlooked during group or individual sessions.
Need Help?
If you have any questions about using accommodations in AbleSpace, feel free to contact our support team at support@ablespace.io.