.png?width=160&height=160&name=Logo%20with%20Text%20(4).png)
The Rubrics data type in AbleSpace is perfectly suited for tracking progress across a defined scale, such as rating student behaviours or skills. This guide will walk you through setting up a rubric-based goal and collecting data.
Part 1: Setting Up a Rubric-Based Goal
To begin, you need to create a new goal that utilises the Rubrics data type.
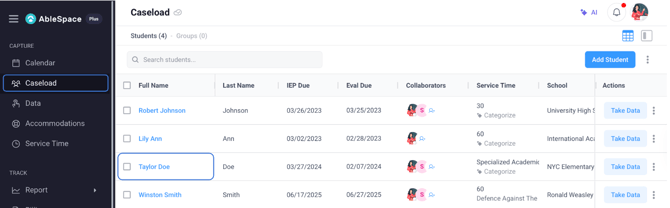
- Select a Student from the Caseload: Start by choosing the specific student for whom you wish to set up the goal.
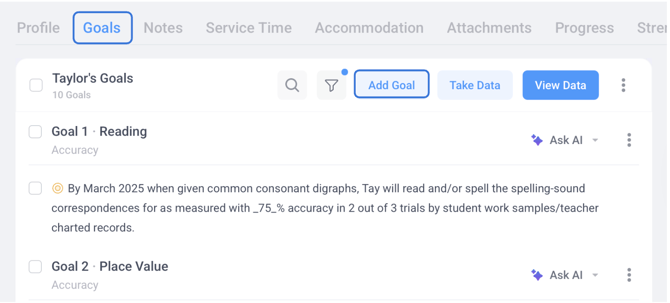
- Initiate Goal Creation: Click on the Goals tab and select the "add goal" button. This action will open the "add goal" dialogue box.
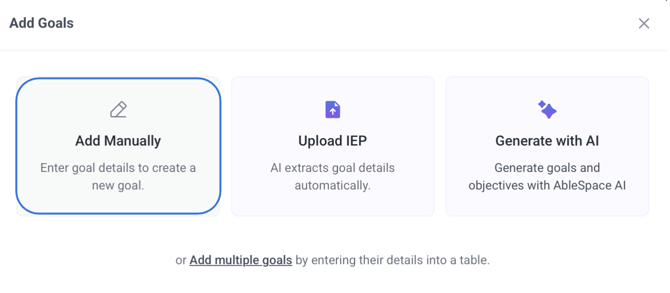
- Add Manually: Within the dialogue box, click the "add manually" button to open the Goal Setup Dialog Box.
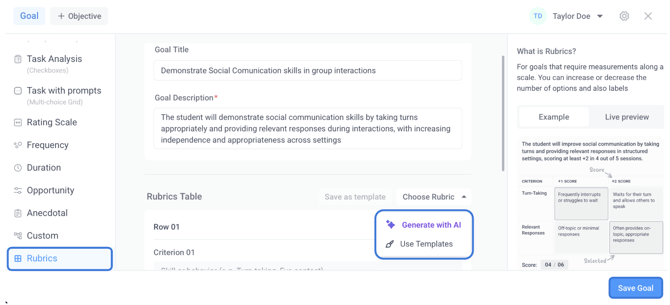
- Choose Rubrics Data Type: From the presented list of data types, select "rubrics".
- Provide Goal Details: Give your goal a clear title and description.
- Build Your Rubric: You have three distinct ways to construct your rubric:
-
- Use AI: Enter the goal description, and the AI will generate the rows, criteria, scores, and descriptions for you.

- Choose from Existing Templates: Select a pre-configured rubric from a list of existing templates.
- Build manually from scratch : To create the rubric from scratch:
- Use AI: Enter the goal description, and the AI will generate the rows, criteria, scores, and descriptions for you.
-
-
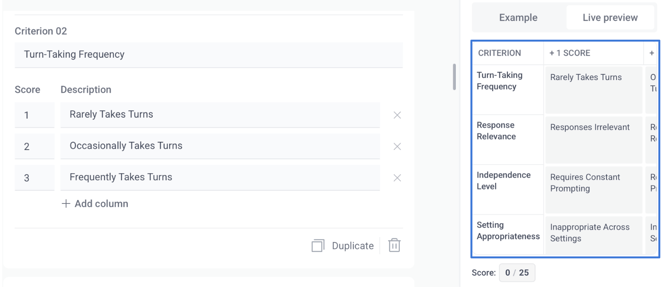
- Enter Criterion: In the first column, enter the criterion. This represents the specific skill or behaviour you will be rating.
- Set Up Scoring Scale (Columns): Next, set up your columns to define the scoring scale. For example, a score of five could be for a student who "does not take turns or interrupts frequently," while a score of 10 could be for a student who "independently identifies when help is needed".

- Add/Remove Columns: Use the "add Column" button to incorporate more columns or the "X" button to remove them.
- Add More Criterions: Click "add row" to include additional criterions.
-
- Finalise your goal: Once your rubric is complete, follow the steps below to finalise and save your goal:
-
- Live Preview: Click the "live preview" button located on the right sidebar. This will show you how your rubric will appear during data collection, typically in a multiple-choice grid format.
-
- Save as Template (Optional): If you anticipate reusing this rubric in the future, click "save as template," provide it with a name, and then hit "save".
- Save Goal: Finally, click the "save goal" button. Your rubric-based goal will be successfully set up and ready for data collection.
Part 2: Collecting Data Using the Rubrics Data Type
Once your rubric goal is established, collecting data is straightforward.
- Initiate Data Collection: Click the "Take Data". This action will open the data collection screen.
- Select Your Goal: Choose the specific goal that utilises your newly created rubric's data type.
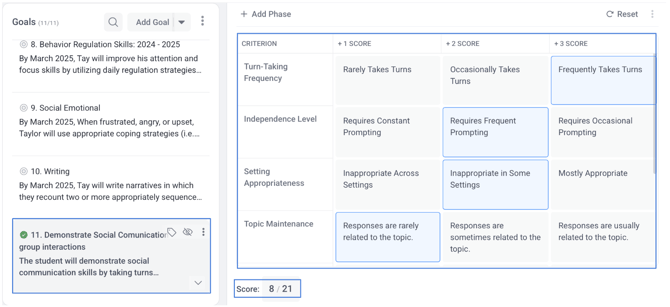
- Understand the Rubric Grid: You will see the full rubric grid displayed in the data tracking panel. In this grid, the rows represent your criteria, and the columns represent the available score options.
- Select Scores: To collect data, simply select the appropriate score for each criterion by clicking on the desired option within the grid.
- Automatic Total Score Calculation: As you make your selections, the total score is automatically calculated. The scoring formula used is the sum of chosen options’ scores divided by the sum of maximum possible scores of selected criteria. This formula provides a clear and quantifiable performance metric for the student's progress.
Need Help?
If you have any questions, feel free to contact our support team at support@ablespace.io.